Managing List Views
LINKPlanner uses list views in several places to summarize information and allow the user to manage the data in a single location. These include:
- Sites List, see Displaying the Sites List
- PTP Links List, see Displaying PTP Links
- PMP Links List, see Displaying PMP Networks
- Access Points, see Hubs
- Subscriber Modules, see Access Points
All of these lists can be managed in very similar ways, using the following features:
Customizing the list
The list display can be customized in the following ways:
- To change the column order, use click and drag on the column headings.
- To sort the list by any column, click in the column header.
- To select which fields are displayed in the list, right-click on the heading row to see the Select Columns dialog box.
The Select Columns dialog box shows the items already displayed in the table on the right hand side and any additional items that can be displayed on the left hand side.
- To move items between the two sides use the highlighted buttons in the centre.
- To move some selected items, highlight the ones required and then use the top two buttons (> to add items to the table or < to remove from items from the table).
- To move all items from one side to the other select >> or <<.
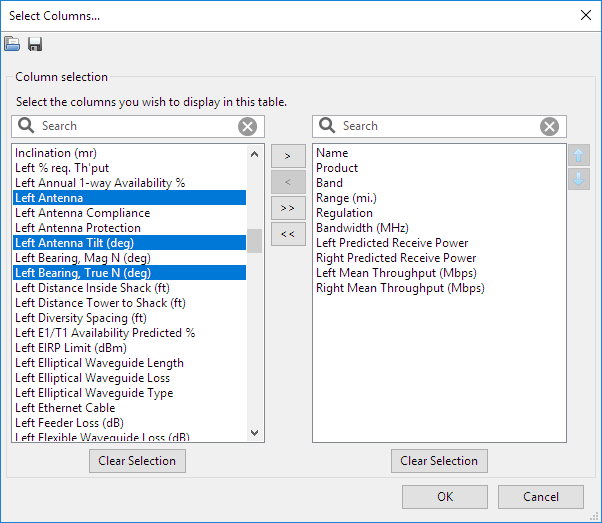
Select Columns dialog window
To change the column order reorder the items on the right hand side. To reorder the items select the items to be moved and use the up and down arrow buttons at the side of the window (or the up and down arrow keys). The items will appear in the table in the same order as in the list.
There is a filter option on both sides of the table, which work the same as other filters in LINKPlanner. When you use the filter the reduced list is indicated with a yellow background. Within the filtered list you can continue to select and move using the single move buttons, however using the move all buttons (double arrow) will only move across what has been filtered.
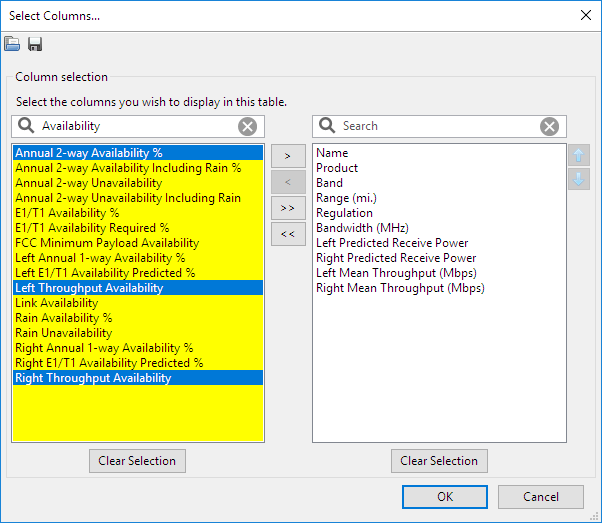
Select Columns dialog filtered list
To save a list select the Save icon ![]() at the top of the dialog box and select the folder to save the .view file. Files can be given any name, but must keep the .view extension. This file can be shared between projects and users. To load a stored view select the Open icon
at the top of the dialog box and select the folder to save the .view file. Files can be given any name, but must keep the .view extension. This file can be shared between projects and users. To load a stored view select the Open icon ![]() at the top of the dialog box, select the folder and file required and select Open. Only .view files can be loaded.
at the top of the dialog box, select the folder and file required and select Open. Only .view files can be loaded.
Editing List details
A number of attributes can be edited in some of the lists. To edit the attribute, select the item in the list and right-click on the cell that you wish to change. The PTP Links Pop-up Menu will appear. Choose Edit <attribute-name> (where the attribute name will be the name of the column heading).
The same attribute can be edited for several items at the same time. If the new value is not valid for the other item settings (e.g. choosing a PTP 670 product even though the band is set to 38 GHz) will result in a warning and the product value will not update.
To quickly select all rows in a table, select one row and then use the CTRL and “a” keys to select all the rows.

Applying a change to a large table may take some time to complete, particularly if it requires displayed results to be recalculated.
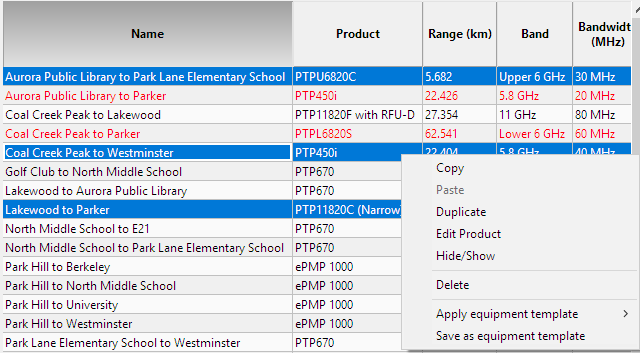
Editing a Property for Multiple Links
Deleting Items
The list can be used to delete items altogether. To delete an item, right-click over it and click Delete.
Deleting Hub sites and Access Points will delete all items connected below that point. A Hub site must contain at least one Access Point.
Viewing & saving the list in MS Excel
To view the list in Excel, click View in Spreadsheet ![]() while viewing the list. Once in the spreadsheet the file can be saved as normal. To export only the columns shown in the list select Tools, Options (Preferences in Mac), Reports and select the option Only export visible columns to CSV file, see Options (Preferences).
while viewing the list. Once in the spreadsheet the file can be saved as normal. To export only the columns shown in the list select Tools, Options (Preferences in Mac), Reports and select the option Only export visible columns to CSV file, see Options (Preferences).