Hubs
The hub site is the location of one or more Access Points.
Creating Hub Sites
To create a new Hub, either click Project, New Hub or click New Hub  . The New Hub page is displayed.
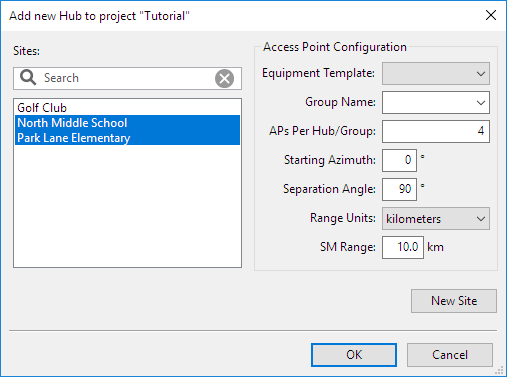
The list of available network sites is displayed, those which don’t yet have a hub site are shown highlighted. The search field narrows the choice when there is a large number of sites in the list. Select one or more sites from the list.
From the right hand side menu, configure the following:
- Select the equipment template from the drop down list to use for the access points
- Select the group name, either select from an existing name in the drop down list or type a new name in the empty box
- Enter the number of Access Points required on each hub or group
- Enter the azimuth of the first Access Point on the site.
- The separation angle defaults to 360 degrees divided by the number of Access Points, select a different angle if required.
- Set the Range Units and the SM Range of the sectors and hit OK.
The sites are then listed in the project navigation tree below PMP Links.
Deleting Hub Sites
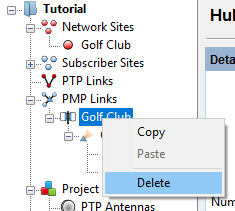
To delete a hub site, select the hub site in the navigation pane, right click and choose delete from the pop-up menu, or select Project, Delete Hub Site name.

Deleting a Hub Site will delete all Access Points and links to Subscriber Modules connected to the Access Points on the Hub Site. The Subscriber Sites will not be deleted and will be available to connect to other Access Points.
Hub Page
The Hub page includes the following features:
- Each section begins with a blue title bar. Click on this bar to open or close the section.
- The numeric data entry fields can be incremented or decremented in steps by using the up and down arrow keys. Use this feature to evaluate the impact of step changes on performance.
- If a field is highlighted in pink, its value is out of the permitted range.
Hub Details
View the Name, Maximum Height, Latitude, Longitude, Description and Number of Access Points and Subscriber Modules. To update this information, see Sites.
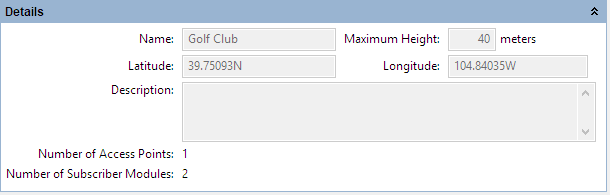
Hub Details
Groups
Add, delete and modify Groups on the Hub Site. A group is a container for a number of Access Points on the same hub. The groups can be used to divide a hub and network into different layers, for example to split between different frequency bands, equipment families or roll out stages. Groups do not have to be added for the majority of products, a default All APs group is automatically created, which contains all APs on a hub site and LINKPlanner will operate exactly the same as before groups were introduced. Groups must be used for cnRanger to represent the BBU, allow the BBU equipment to be added to the BOM and to control common parameters for the RRHs.
If the same group name is used on multiple hub sites then the Best Server Analysis will run at the selected group level, see Best Server Analysis. Lower level sections on the hub page are dependent on the group selected, allowing more granularity on how to control and report what is happening at a hub. Reports created at the hub level using the  and
and  icons in the toolbar are created for the selected group. Reports created from the File menu will be for all Access Points on the hub.
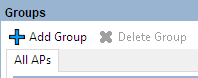
Hub Groups
There will always be an All APs group, which cannot be deleted and contains all the access points on the Hub. To add a new group, click  . In the Group Name dialog box enter the Group Name. To delete a group, select the group name and click

Add New Group
Access Points View
View, add, delete and modify Access Points on the selected group on the Hub Site. To manage the information displayed in the list, see Managing List Views. The title in the blue bar shows which group is selected, if the title shows for hub this refers to the All APs group, otherwise it will show the group name.

Access Point View on Hub Page
To add additional Access Points at the hub site, click  . A new access point will be added, incrementing the Access Point number, the other parameters will be the same as the first Access Point. To add multiple Access Points with the same configuration, configure the first Access Point before adding the remaining Access Points.
To update subscriber module parameters and performance calculations after editing Access Point parameters, select Calculate Now, unless Automatic Calculations are enabled, see Project Toolbar .
To delete an Access Point at the hub site, select the Access Point row and click  .
.
A Hub site must contain at least one Access Point
Performance Summary for Hub/Group
This is a high level summary of the number of Access Points, Connected Subscribers and Throughput at either the Hub level (for All APs) or individual group level.
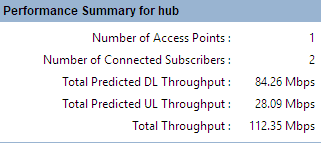
Performance Summary of Hub or Group
Throughput values are not shown for cnReach Access Points, but the number of Access Points and Subscribers will be shown.
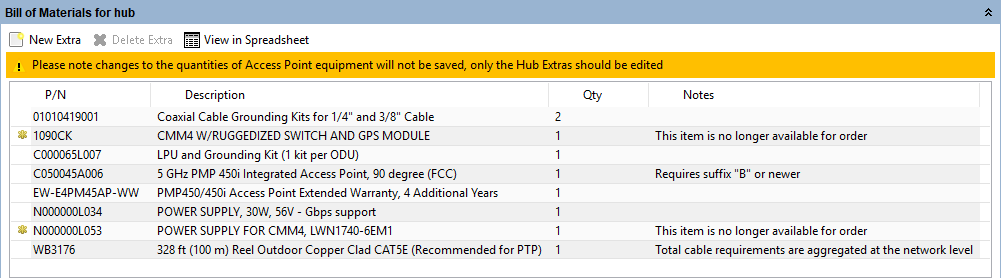
Bill of Materials for Hub/Group
LINKPlanner automatically calculates the Bill of Materials for the Access Points on a Hub Site, at either the Hub or Group level. The Bill of Materials at this level includes the aggregate equipment required for all the Access Points on the Hub Site or Group. If a Group contains Access Points configured for cnRanger then the Group BOM also includes the BBU level equipment.
To add additional items to the BOM, click New Extra  . A list of optional extras for the hub will be displayed. To add items to the BOM tick the box next to each item required and click OK. The item will appear in the main list, where the quantity can be adjusted by selecting the number in the Qty column and adjusting as required. To delete optional items from the BOM list, highlight the items and click Delete Extra
  . A star denotes optional extras which have been added to the automatic BOM items.
Only the quantities for the optional extras and BBU equipment will be saved as changes with the project. To change quantities for the Access Points adjust the quantities on the Access Point Bill of Materials, see Bill of Materials for Access Point.
Bill of Materials for Hub or Group
Viewing & saving the Hub BOM file in MS Excel
To view the Hub or Group BOM in Excel, click View in Spreadsheet ![]() while viewing the Hub or Group BOM. Once in the spreadsheet the file can be saved as normal.
while viewing the Hub or Group BOM. Once in the spreadsheet the file can be saved as normal.
All numeric only part numbers consist of 11 digits, if the number displayed is only 10 digits the part number should start with a zero.