Copying or Importing Sites
Site data can be brought into LINKPlanner from Google Earth(TM) (.KML) or from comma-separated files (.CSV). Before copying or importing sites, ensure that the correct project is open in LINKPlanner.
Copying or Importing Sites from Google Earth(TM) (.KML)
Site details can be copied or imported from Google Earth(TM). Locate the sites in Google Earth(TM) using address or zip code, then insert placemarks.

When a site is located using address or zip code, Google Earth(TM) inserts the placemark in the street adjacent to the building. To obtain precise latitude and longitude, move the placemark to the building where the antenna is mounted.
In Google Earth, create a folder and add all required placemarks to that folder. There are two ways to import those placemarks into LINKPlanner:
- Use copy and paste: Right-click on the folder (or if there is only one site, right-click on the placemark) and click Copy. In LINKPlanner, click Edit, then either Paste Network Sites or Paste Subscriber Sites.
- Import from KML/KMZ file: Right-click on the folder and click Save Place As to save it as a .kml or .kmz file. In LINKPlanner, click File, Import, then either Network Sites from KML/KMZ or Subscriber Sites from KML/KMZ.
Importing Sites from a Spreadsheet
Use this method when site information is in a spreadsheet. The required fields for each site are Name, Latitude and Longitude. The optional fields are Maximum Antenna Height and Description. The procedure is:
Import the data either by copy and paste, or by importing from CSV.
To import by copy and paste (Importing From a Spreadsheet Using Copy and Paste): select the data in the spreadsheet and click Edit, Copy; then in LINKPlanner, click Edit, then either Paste Network Sites or Paste Subscriber Sites.
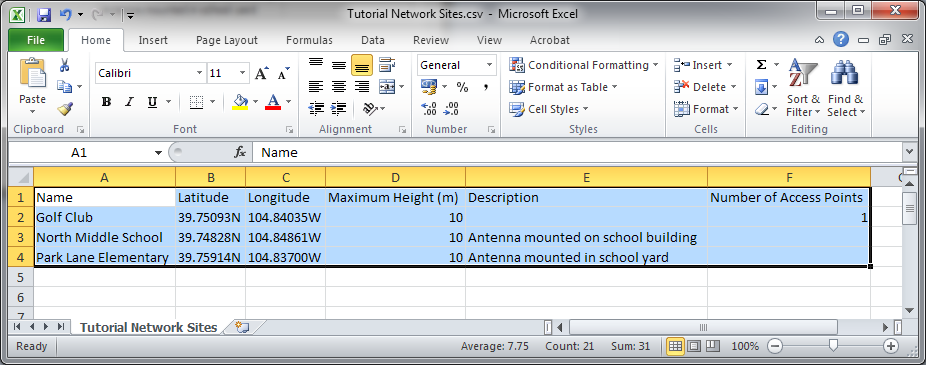
Importing From a Spreadsheet Using Copy and Paste
To import from CSV: save the spreadsheet as a CSV (comma separated) file; then in LINKPlanner, click File, Import, then either Network Sites from CSV or Subscriber Sites from CSV. If Subscriber Sites from CSV is selected, LINKPlanner will automatically tick the Subscriber Sites? box.
Whichever method is used, the Table Import Wizard is presented:
LINKPlanner attempts to detect the correct delimiter and encoding for each CSV file, but it does not always succeed. If the data is not displayed in the correct columns, specify a different delimiter or encoding.
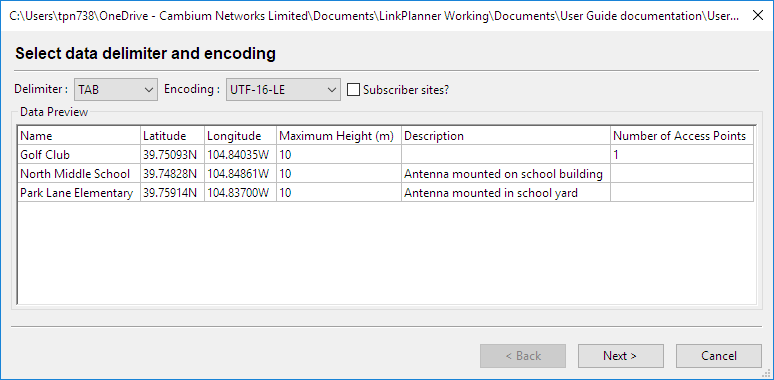
Table Import Wizard
Select the columns to be imported:
If the first row contains column headings, tick Skip first row.
For each column, select whether it should be used for the site Name, Latitude, Longitude, Maximum Antenna Height, or Description. Ensure that unwanted columns are ignored (Selecting Columns to be Imported). The Maximum Antenna Height may be specified in feet or meters. Select multiple Description columns if required, but select the other columns once only.
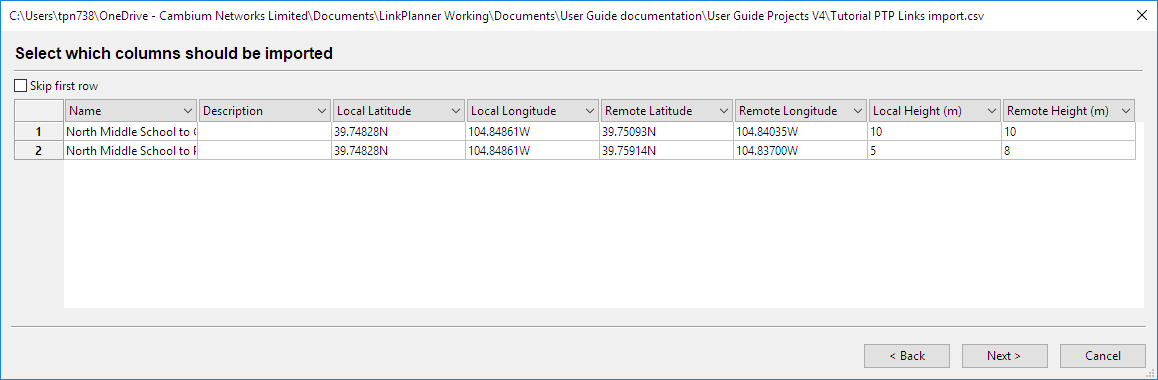
Selecting Columns to be Imported
Correct any values that cannot be imported:
If LINKPlanner cannot interpret any of the values (for example, if a latitude or longitude is not formatted correctly), the cell is highlighted in red. Double-click in a red cell to edit it (Value Cannot be Interpreted).
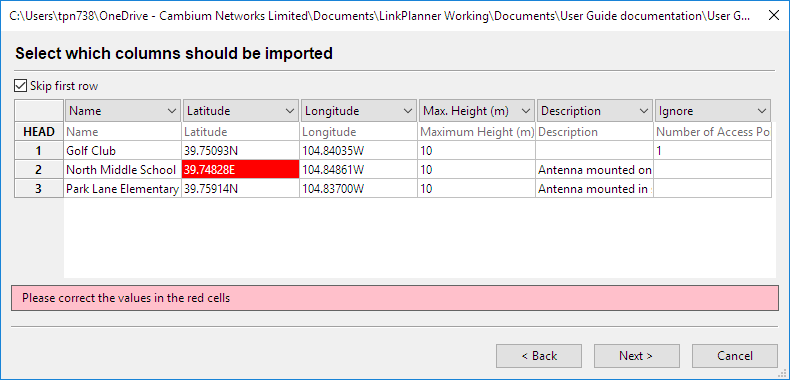
Value Cannot be Interpreted
If site coordinates match (1m tolerance) site locations in the current project file then the matching cells will highlight in yellow and a warning will appear. It is still possible to import the data, but it will result in duplicate sites in the project file.
Verify the map of newly imported sites:
The wizard displays a map of the new sites to confirm that the positions are correct (Map of Newly Imported Sites). If they are correct, press Finish.
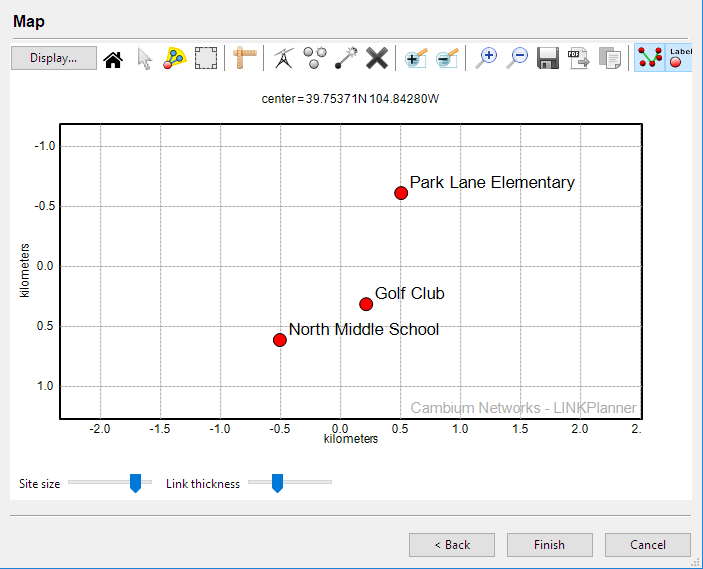
Map of Newly Imported Sites
Use Google Earth(TM) to confirm the latitude and longitude from .csv files.
Accessing Imported Sites
When sites have been imported, access them from the Sites node in the navigation tree, as described in Project Navigation Tree.