Verifying a High Point Using a Survey
This is an example to show how Cambium link planners use a high point survey to refine their estimates of the terrain and obstructions near high points. This builds on the previous example Verifying a High Point Using a Map.
We use the following survey aids:
- Map, path profile, Google Earth(TM) aerial photo
- Barometric GPS receiver
- Clear plastic ruler
- Surveyor’s tape measure
- Pocket calculator
- Binoculars
We follow these steps:
We use the barometric GPS receiver to verify terrain height.
Because air pressure may change frequently, the GPS receiver must be recalibrated near every high point, at a point with a known altitude. The map shows a suitable point for calibration, where the road crosses the 150 m contour near the high point, as annotated on this Google Earth photograph:
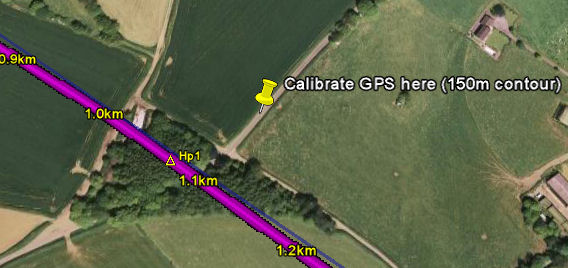
GPS Calibration Point near Hp1
We calibrate the GPS at this point.
We go to the high point (or as near to it as possible) and record the terrain height from the GPS: 156 m.
We go to a place where we can observe the trees from a measured (or estimated) distance.
We estimate the height of the highest trees in the clump using the ruler method, as described in Verifying a Link End Using a Survey. We record the height of the highest trees: 20 m. We also record the height of the trees at the edge of the clump: 15 m.
When we return to the office, we update the profile with these results, adjusting the clutter type to Deciduous Forest at 15 m with a slight adjustment in the terrain height and on the outer edge setting the clutter to Light Trees - Shrubs at 5 m with an additional obstruction loss of m.
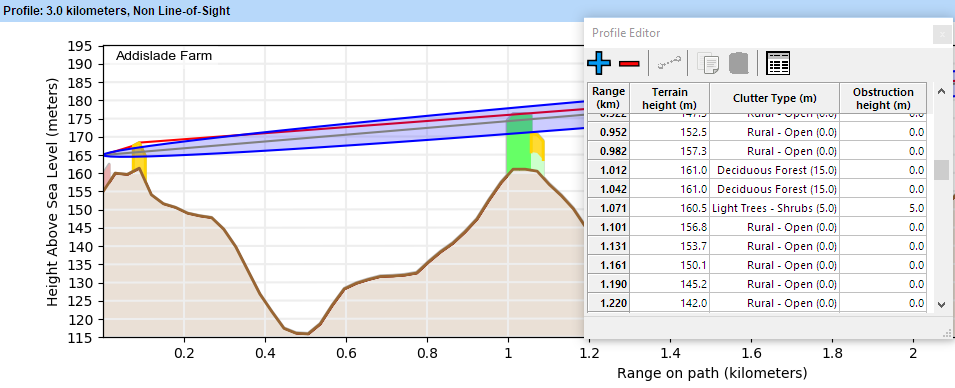
Profile updated with Hp1 survey results
We now have a more accurate profile of the high point. This will help us to optimize the link and achieve acceptable data throughput.